LIC Calf Club / Pet Day Events 2024
LIC is pleased to once again support annual community Calf Club and Pet Day events that are held by rural schools and communities throughout New Zealand.
You're be welcome to register your school or community Calf Club event via this website from 2024. By doing so LIC will send a branded ‘Champion’ style ribbon to award to a child and animal of your choice on the day of the event.
Parading pet animals from the farm is a genuine highlight of rural school children, but because Mycoplasma bovis is now in New Zealand, we ask that everyone is extra careful when their calves get close to other calves, because the disease spreads primarily through nose-to-nose contact.
Ensure your calf has its own:
1) Food and water containers
2) Halter and lead
3) Is tied up at least two metres away from other calves
We also need to keep in mind good health and safety practices, as a result of COVID-19.
Frequent use of hand sanitiser and hand washing are important steps in keeping everyone safe and healthy.
Get in touch
LIC’s network of Agri Managers enjoy attending these community events, and although a visit in-person isn’t always possible, you are encouraged to invite their attendance or at least approach your local Agri Manager for further support. See here for contact details of an Agri Manager in your region.
Rearing animals is a rite of passage for rural children, where they learn animal husbandry and nurturing skills. LIC realises this is a core part of a rural child’s upbringing, education, and lifestyle.
See below for LIC’s guide on how to raise and rear a calf.
All the best for an enjoyable event in your community.
Dairy cows came to New Zealand on sailing ships with early settlers during the 1800s. By the early 1900s, the industry was prospering and growing with farmers joining together to form herd testing co-operatives (which would, in time, become today's LIC) and dairy factories to process the milk their herd produced.
As the adult side of the industry grew, so too did the junior, and the earliest recording of a calf club event was in 1911, when the Boys and Girls Agricultural Group began in Otago.
The natural partnership of children and young animals was encouraged as farmers recognised the benefits to be gained by children having the responsibility of training and caring for a young animal.
In regions around the country, the enthusiasm of farming parents combined with local schools gave life to calf club. And so it has been for nearly 100 years.
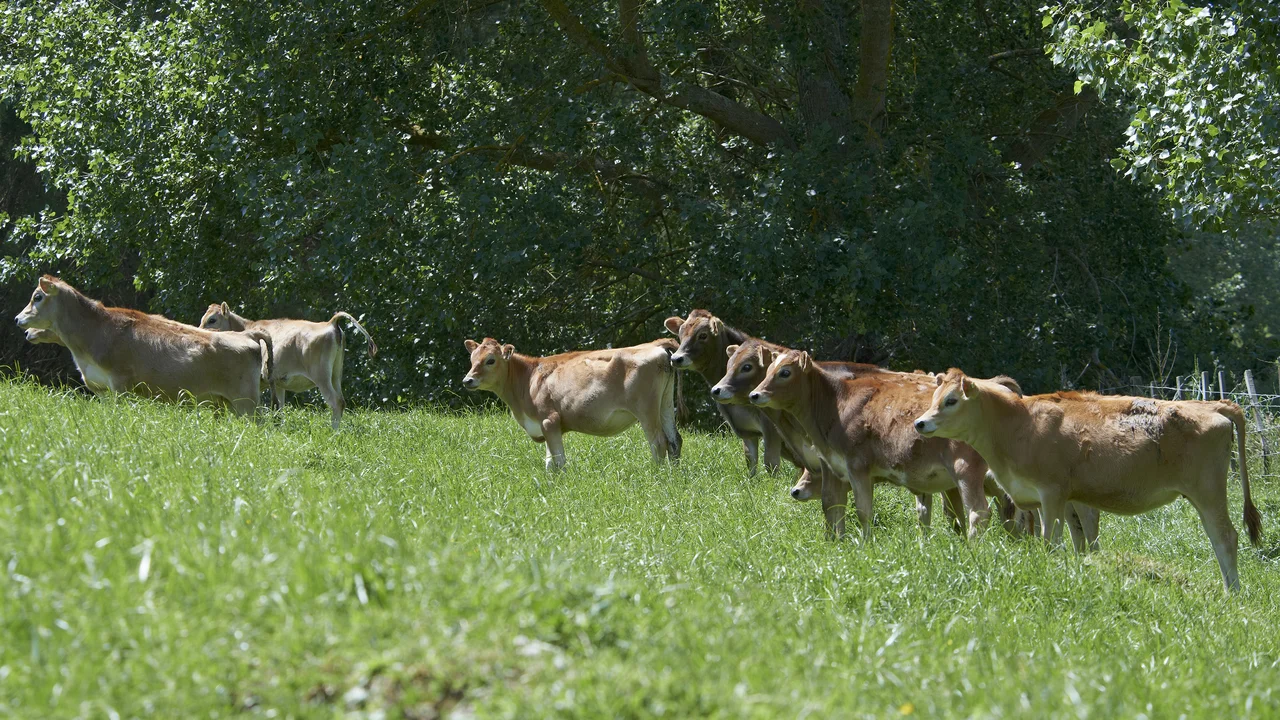
Today, many dairy farmers and their children look back with affection at the time they spent selecting, feeding and training calves for calf club and the events continue to be held each year in a large number of rural schools and communities across New Zealand.
Type of calf
Calves are born around July and August, and most calf club events are held in October or November so you need an idea of how big your calf will be when you lead it out at your local event. You need a calf you can manage and the farmer who bred it is the best person to talk to.
Shelter
Your calf will need a well-fenced paddock with shelter to protect it from cold wind and rain, especially when it is very young.
Grazing
Your calf will need good quality, fresh, long grass and clean water in a low trough they can easily reach.
Milk and food
Calves need a lot of milk. This can be fresh or powdered. If you are using powdered milk there are two types - one for newborn animals and standard rearing milk for when it's more than a week old. You will need to know where you will get your milk from. You will need a special feeder bottle to feed your calf. Stallion Plastics make a great one which will be easy for you to hold, and makes it easy for the calf to drink. Feeding your calf is the important first step to getting it to trust you – and that’s the beginning of your friendship.
Cover, brush, halters & leads
A cover will help your calf stay warm, dry and clean. You can make one from old sacks or you could do some jobs and save your pocket money to buy one. Brushing your calf regularly will keep it clean and looking beautiful, it will also help develop its trust in you. You will need a halter and lead to train your calf to walk with you.
Time
Your calf is your responsibility so you will need to make sure you have time to look after your calf before and after school each day for about 6-12 weeks. This means about 30 minutes each morning and afternoon, so you may need to get up earlier in the morning, and then spend some more time with your calf in the afternoon before you do your homework after school.
If you’ve said YES to all these things, you’re ready to move on to the best bit – choosing your calf.
Your calf will be your pet, so it’s important that its type and size matches your age and size.
You will spend hours with this young animal and become very fond of it, so the first step is to ask a farmer if you can have a calf. This could be your neighbour, parents or friends.
You will need to convince the farmer that you are really serious about having a calf, and that you will love and care for it. It also helps if you have some idea of the type of calf you’d like – this will help convince the farmer that you’ve done your homework, and make him or her happier to entrust you with one of their calves.
Remember to have this talk before calving starts so the farmer can watch out for the right calf for you.
Calves for calf club are generally heifers (female) and after calf club is over they return to become 'just another' of the heifer calves which will grow and become part of the herd.
When choosing your calf, look at the herd you’re getting your calf from so you know what a good cow looks like. Cows have to walk long distances, eat lots of grass, make milk and have calves of their own - so they need to be strong and healthy.
What to look for?
Looking at the mother of your calf will tell you a lot about what your calf will be like when it grows up – but here are some general guidelines.
- size - you need to be able to control it when it is two to three months old, so it’s important not to pick a calf that will be too big and strong
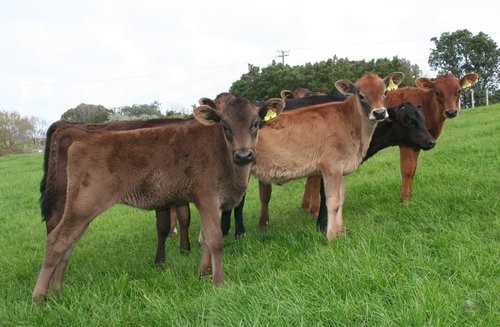
- colour - Generally the colour will tell you what breed your calf is – black and white for Holstein-Friesian, gold through brown and black for Jersey, and black or black with brown or white for crossbred. Make sure the calf you choose has a nice mix of colours.
- body shape - good calves have a straight back, strong neck, sloping shoulders, an attractive head with well-set ears and eyes, a wide brisket (chest)
- strong ribs and straight legs that walk well
- skin & hair - a fine coat which lies flat will be easy to brush
- good temperament - a friendly calf will enjoy its life with you and be easier to train and show at calf club, rather than one that is shy or nervous
- health - your calf needs to be healthy and have been fed colostrum (the first milk from its mother) after it’s born.
Each time you are with your calf, take careful note of the way it is acting - is it 'bright and breezy', running to you to be fed; is its coat shiny and its eyes bright; are its motions yellow (if it is on a milk diet) or dark green if it is eating meal and grass.
If your calf's motions become runny, very pale in colour and/or smelly it could mean it has scours. If this happens, immediately tell your parents or the farmer as it will need antibiotics from a veterinary surgeon to get better.
Remember – to avoid your calf getting scours, make sure everything it eats out of is spotlessly clean. Also make sure that its bedding (it may have sawdust on the floor of a pen) is always clean – rake any soiling out of the bed regularly so your calf has a nice clean, dry place to rest.
And remember to always wash your hands carefully after caring for your calf, and before eating.
Disbudding
Most cattle grow horns and if they are not removed, they have the potential to cause harm to people and other animals. It is best practise to prevent the horn from growing. This is done by removing the horn buds when calves are very young - between two and six weeks old. The most effective way to remove horn buds (disbud) is by hot iron cautery and 97% of farmers prefer to use this method. Disbudding is usually performed by experienced veterinarians and animal husbandry service providers, to ensure this procedure is done correctly.
With the calves’ welfare in mind, the recommended best practise is to provide pain relief when disbudding to help reduce the pain and stress caused by this procedure. Please note that by the 1st October 2019 pain relief will be required.
Innoculations (disease prevention)
Right from the first days when you have your calf, talk to the farmer about what innoculations it needs to remain healthy. He/she will be the best guide and will probably provide the innoculations as they do their other calves.
Veterinary care
For the first three to four days of its life, your calf will normally drink colostrum which is the first milk produced by a cow (its mother) after giving birth. It has special ingredients that protect the calf from infection and help it become strong in the first days after its birth.
When the calf's care is passed to you, it will generally have finished this colostrum phase (when it will usually have been with other calves in an indoor pen drinking from a calfeteria) and should know how to suck from an artificial teat.
You will by now have arranged to have a pen or small paddock where your calf can be kept on its own, or with other calves which are being hand-reared. For the first few days as you become friends, it will help if this is a small area so, wherever you are in the pen, you are close to the calf - it can hear your voice and will soon begin to trust you. The best way to forge a friendship with your calf, of course, is by feeding it.
Right from the start, your calf will need feeding twice a day - in the morning (before you leave for school) and the afternoon (when you get home).
If you're lucky enough to live on a dairy farm, you will probably get your milk direct from the farm dairy in the mornings and afternoons, when it is still warm so you can immediately feed your calf. If you don't live on a dairy farm, you will mix special calf milk formula with warm water (the water-powder ratio is given on the outside of the bag of milk powder) and feed your calf.
It is very important to keep whatever utensil you use to feed your calf (bucket, mother udder, calfeteria) very, very clean - calves can get 'a tummy bug' called scours (diarrhoea) from dirty feeding utensils, so be very careful to clean everything in hot soapy water after each feed so it is clean for the next feed.
How much to feed
The farmer will be the best one to tell you how much milk to feed your calf - and you will need to review this at regular intervals because your calf will grow very quickly. As a general rule, after feeding your calf will look full, his/her tummy will look round and the calf will be happy, not calling out for more milk.
Your calf needs to be fed milk regularly, at least twice each day. Use whole milk or one of the brands of milk powder available at your local farming store. A common rule is 10 per cent of body-weight, so a 40kg calf needs four litres each day or two litres twice a day. It is important to mix powders at the correct levels so be sure to read the instructions on the calf milk packet very carefully, and follow them strictly.
Be sure to feed your calf at the same time each day - it's like you; it will soon learn when 'dinner time' is. In addition to milk, your calf needs access to clear water and good quality, fresh, grass.
Calf meal
Your calf will grow quickly and will soon begin nibbling grass and drinking water from the trough. At around two weeks you will want to introduce calf meal to its diet so it grows well and has 'good condition' (has a good cover of fat and muscle) and is contented during the day between feeds.
Meal is fed in the mornings, after your calf's milk feed. You will need a large, flat-bottomed feeder which your calf can't push around the paddock.
Although the supply of grass, hay and meal increases as your calf grows, it is still important to keep feeding milk as this ensures your calf keeps a shiny coat for calf club.
Weaning
At around two to three weeks, and after checking with your farmer, the calf's twice daily milk feeds can be reduced to one - generally in the morning. The amount of milk generally increases so your calf is getting one larger drink of milk each day.
Calves generally remain on once-a-day milk feeds with grain until after calf club. Weaning then takes place when the calf returns to the farm.
Training your calf happens at the same time as feeding – so right from the first day, you need to spend time with your calf so it trusts you, and allows itself to be held and lead.
Fitting a calf cover
Calf covers serve two purposes – they keep your calf warm and dry and also flatten and polish its coat preventing fading from the weather, and meaning your calf will have a shiny coat when it gets to calf club.
Calf covers are easily made from empty meal sacks – but first check with the farmer and/or your parents to be sure the sack is not made of plastic which does not ‘breathe’. The ideal sacks are light and made of synthetic fibre in a woven pattern which allows air to pass through, while keeping the calf warm. A light, soft blanket sewed into the inside of the cover will ensure your calf is warm - but be sure it is a light blanket so the cover does not become too heavy for a small calf. Velcro straps sewn onto the front and back will allow you to remove it easily for grooming and will also allow you to increase its size as your calf grows.
The ideal cover should cover your calf from its shoulders to its rear. Be sure to watch for rubbing of hair or skin under the velcro straps.
Fitting a halter
Calf halters can be purchased from your local farming store; they are made of soft leather and can be adjusted so they fit very small and quite large calves.
Halters are fitted for around one hour each day of the calf’s life with you – leaving it on for longer would rub hair off. As soon as possible after your calf arrives, fit the halter with help from the farmer, Mum or Dad.
When fitted correctly, you should be able to fit two fingers between any part of the halter and your calf’s skin, and it should not pull off if the calf pulls back.
At first your calf will notice the strangeness of having something on its head and may try to rub its head against you, the fence or the ground to try and remove it. The best way to minimise its concern about the halter is to fit it just before the calf is fed – it will then turn its attention to eating and will forget about the halter.
You will need some grooming equipment – a bucket, some soap or animal shampoo, a small piece of old towel or sponge (for washing), one of Mum’s old towels (for drying) and a soft brush (for grooming).
Each day, remove your calf’s cover and brush it all over – remember you are brushing the hair, removing dirt and dust, not rubbing the skin so don’t push too hard as your calf will move away from the pressure of the brush. Calves normally love this time, as the brush removes all the itches from its coat and also get to those ‘hard to reach’ places that its hooves can’t reach, or it can’t scratch on posts or branches of trees.
Calves normally love this time, the brush removes all the itches from its coat and also get to those 'hard to reach' places that its hooves can't reach, or it can't scratch on posts or branches of trees.
You may know someone who shows cattle or horses – they might be able to share some of their ‘secrets’ for getting more shine on their animal’s coats.
Washing your Calf
Wash your calf when it is younger so it is used to the feeling of warm water and soap on its coat - but remember:
- only wash your calf on a warm day and with plenty of sunlight so its coat dries before the day becomes dark and colder
- use a mild soap or shampoo; wet the coat thoroughly with warm water and rub in enough soap to get a good lather. Massage the coat and skin so you get all the dust, dirt and scales of skin out before you rinse it - preferably with a soft stream of warm water from the hose (if it is a warm day, the water in the hose will be a good temperature to rinse the calf's coat)
- be sure to rinse all the soap out of the coat because any residues of soap will limit the amount of shine you will get from the coat when it is dry
- scrape your calf's coat with the side of your hand to remove the surplus water, and then briskly rub it all over with the towel
- your calf's coat will still be damp, so you should brush it to lay the coat down flat, and leave the calf tied up in a warm, dry, clean place out of draught so its coat dries before you put its cover on.
You need to train your calf to do three things on the lead - to walk forward alongside you, to turn when required, and to stop.
When the calf appears to accept the halter, you can begin teaching it to lead. There are several ways to do this – you can pull and tug, or you can get Mum or Dad to help you tie a long soft rope into a big loop – big enough to fit around your calf’s bottom, under its tail, with the lead coming over its back and through the loop on the halter. Now, when you pull the lead, the rope will come up under the calf’s tail and it will move forward. As it moves forward, the pressure under it’s tail stops, and so it learns to move forward. This way often trains a calf in a shorter time than any other method.
Position of the calf when leading
You want your calf to walk on your right, and for its head/shoulder to be alongside you. Your right hand holds the rope close to the halter (around 15-25 cm away from the side of your calf’s head), with the rest of the rope in your left hand so it is not trailing on the ground where you or your calf can walk or trip on it.
Never wrap the rope around your hand – this is very dangerous as it could mean you are dragged if the calf gets a fright and attempts to run away from you.
Turning
If you have followed the steps described above, you will have your calf moving happily forward with you. Now you have to learn to turn the calf. Remember you are on the outside of the calf when it turns, so you need to push its head towards the new direction as you begin to make the turn – and remember, the turns need to be very big at the start as your calf won’t be used to this new movement and you don’t want it to become unbalanced and trip or it would get a fright and lose confidence in you.
Stopping
You also need to learn how to stop your calf. This is done by a gentle pull on the lead rope and shouldn't be done suddenly which would give your calf a fright. Let it know you're going to stop, by giving gentle tugs on the rope, and then a long pull, fixing your feet on the ground and leaning back a bit so the calf feels your weight on the rope - don't give any hard, sudden pulls on the rope though as this would hurt the calf's nose.
Stand still for a minute or more - the calf only moving forward again when you decide to.
How often and how long to train
Start with a few minutes training each day. After each session, praise and pat your calf. When it is happily going forward you can take off the 'bottom' rope and just have a lead rope tied to the halter.
Varying your leading routine
Remember to vary the routine when you walk your calf - at first go in straight lines and, when you turn, make sure the calf is on the inside of the turn (and you are on the outside). As the calf gets more used to going for walks with you, vary the route you take - walking it past 'different' things which might distract it so, by the time calf club comes along, your calf is almost 'bomb proof' - used to all sorts of sights and sounds. Be sure to walk the calf in various patterns too - circles, loops, zig zags - but remember that it has four legs, so don't make sudden turns which could make it lose its balance or its confidence.
Training time should be fun, for you and the calf, so do train every day, but don't train for so long either of you becomes bored or tired. Decide what you want to achieve, do it, and then reward your calf, groom and cover it and let it go in its paddock.
Leading in preparation for calf club
At calf club you will have to lead your calf in a large square, walking it around pegs in the corners and doing a complete circle around one peg. You also have to stop the calf and make it stand still so the judge can look at it closely. Practise these movements - and don't forget the 'standing still' training!
Teaching your calf to tie up
You can now begin to train calf to tie up. For the first attempts, use the long, soft looped rope, but do not 'tie' the other end to a post - simply wrap the end of the rope around a post and keep hold of it. The calf may pull back, but the rope will come up under its tail and it should walk forward. When it does, make a fuss of it, release the rope and go for a walk. Repeat this each day, briefly, until the calf does not pull back. You can then tie the calf, with the proper lead rope, to the post. In the early days of tying up, don't walk away from the calf as it will just try to follow you. Instead use this time as 'grooming' time, spending time brushing its head, body and legs, and talking to it.